I had always wanted to see what working with metal was like. During this class I have worked with wood, carboard, epoxy and cement
but it did not seem to me that those techniques I was using would transfer to sheet metal.
Coming into the training I was nervous that there would be a lot to learn. As soon as I walked into the lab I saw these master pieces.
Although John made it really easy to learn.
Starting Tools and Materials
We started by using 22 gauge steel with .7mm thickness. For this project we were given a 24x24 piece of this mild steel. For the cutting the metal
we were using the Fab Lite laser cutter.
This was a powerful laser cutter that was able to be used to cut steel and other metals accurately. This used similar software to other laser cutters that
I have used in the past. This software was called Fab Creator.
Make DXF, I'll get back to this later
Import DXF
Choose whether to cut, engrave or raster specific areas
Choose the properties of the metal we are using
Save as a .fav file onto a USB flash drive
Cutting the sheet metal
Then go over to the machine
Turn it on
put the flash drive in
Turn the key
Home the machine
Put in the sheet metal by pulling out the table
Lock the metal in place
Push back into the machine
Press New Job
Select your file
Then run your job
The laser cut much faster than I expected. When I asked about the speed constraints we talked about how the laser needs to go at
a certain speed to cut the metal and if it goes faster then the laser would need to be stronger because it is on the metal for less time.
Processing the Metal
Once the metal pieces were cut out. We needed to start by filing the slag, which is essentially the etches that were left after the
cut. After getting a file, a couple tips that I thought were really helpful was
Only go one direction when filing, away from you
Hold the file parallel the the sheet metal
file at around a 30 degree angle from the piece
Hem
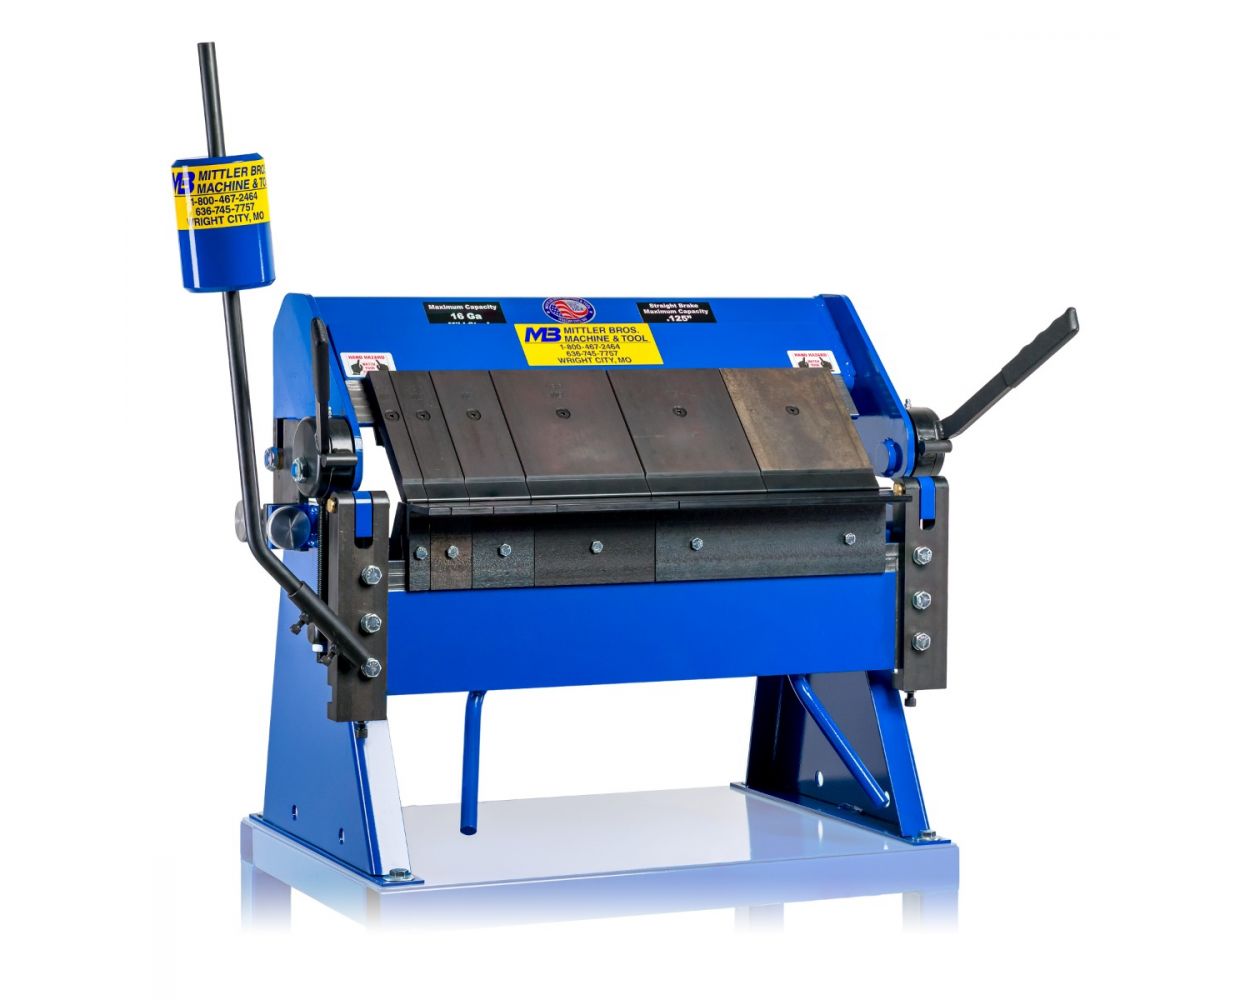
After all the pieces were smooth we first moved to the finger break.
This ominous sounding maching was a behemouth, but in reality it was a pretty simple machine. This was used to bend the metal into the
correct shape. We started with the hems before moving the the middle portion. The hem is the edge that we are rounding. To make the hem
you first line up the bend with the inside line of the device. Lock the device by pressing down the fingers. Then bending the metal as far
as possible. Next you put it in again and try to push the edge down.
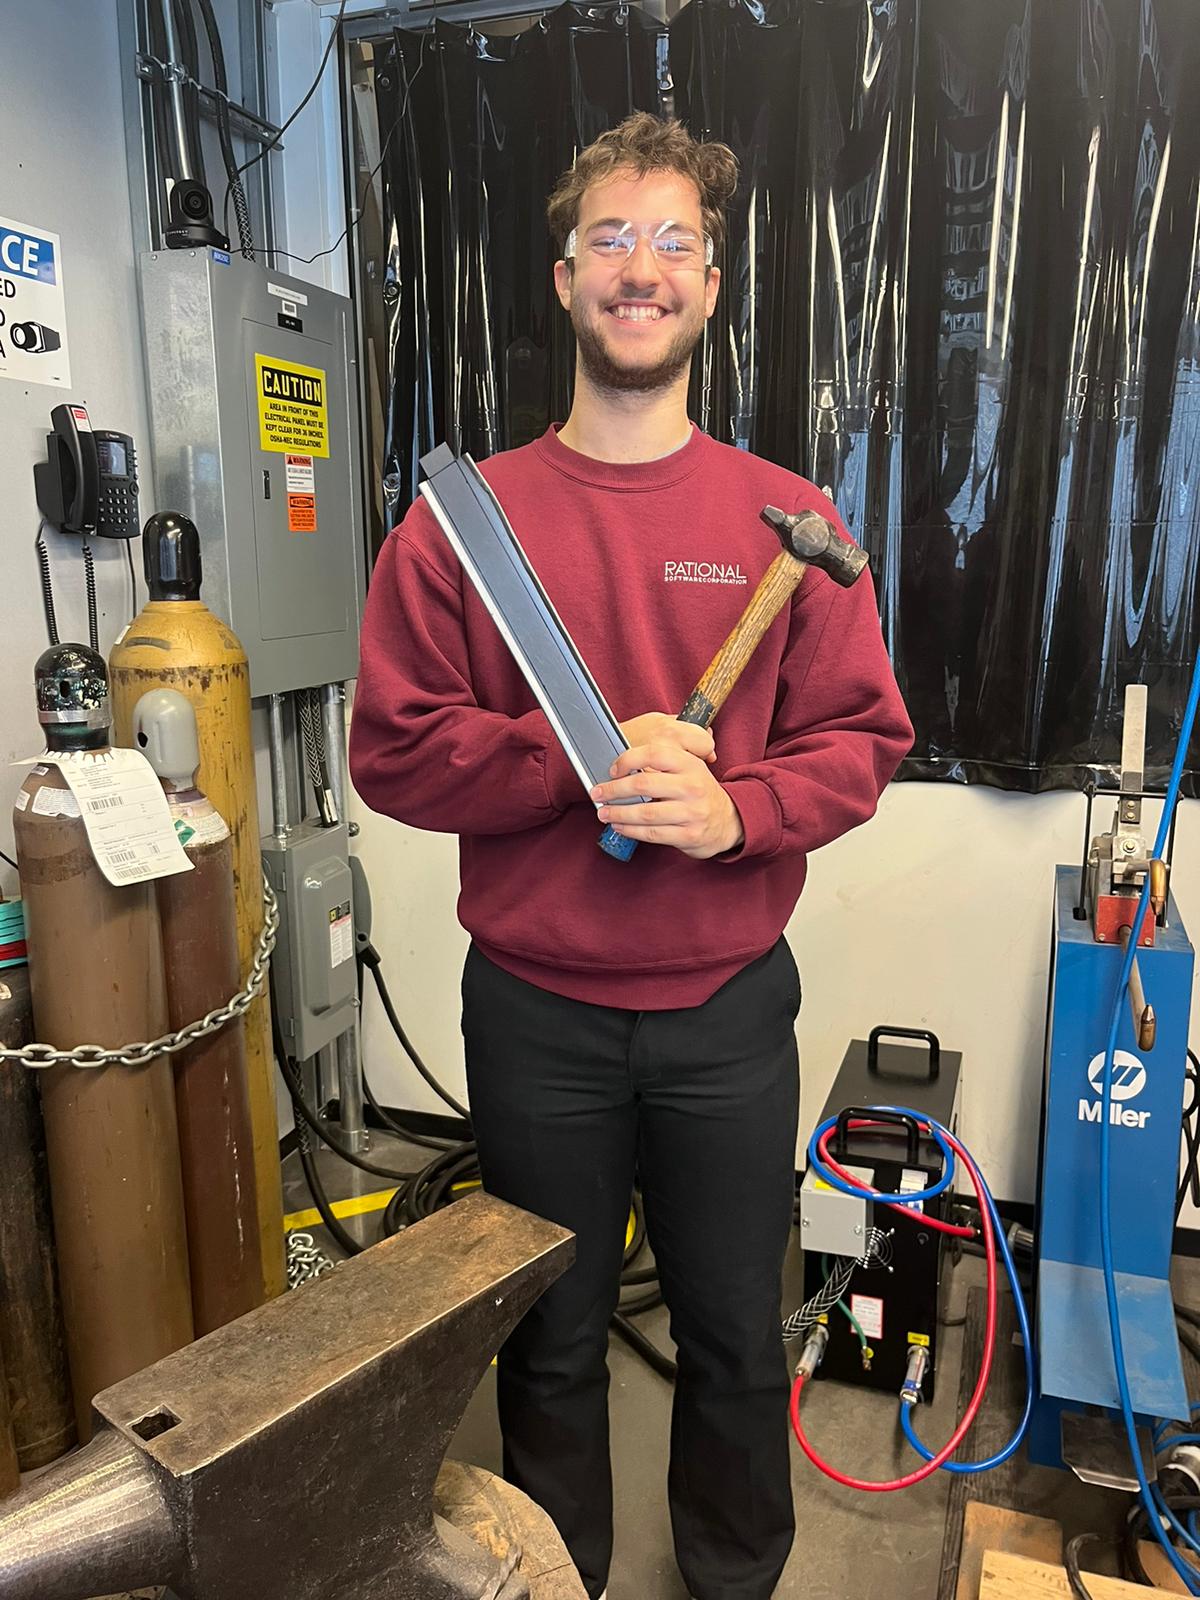
To make the hem flat we then went to the anvil. This made me feel like Tony Start. It was essentially taking a hammer and hitting the sheet
metal until it was flat. I was scared at first that I was going to hit my fingers but after getting over that it was very satisfying.
Finishing bending
After the hem, we went back to the finger break machine and bent the rest of the pieces into place. In once instance we needed to move
the fingers around so that we can bend a part that had two 90 degree angle bends on the sides.
The other part that bent differently was the handle. For this we put it in a vice then pulling down.
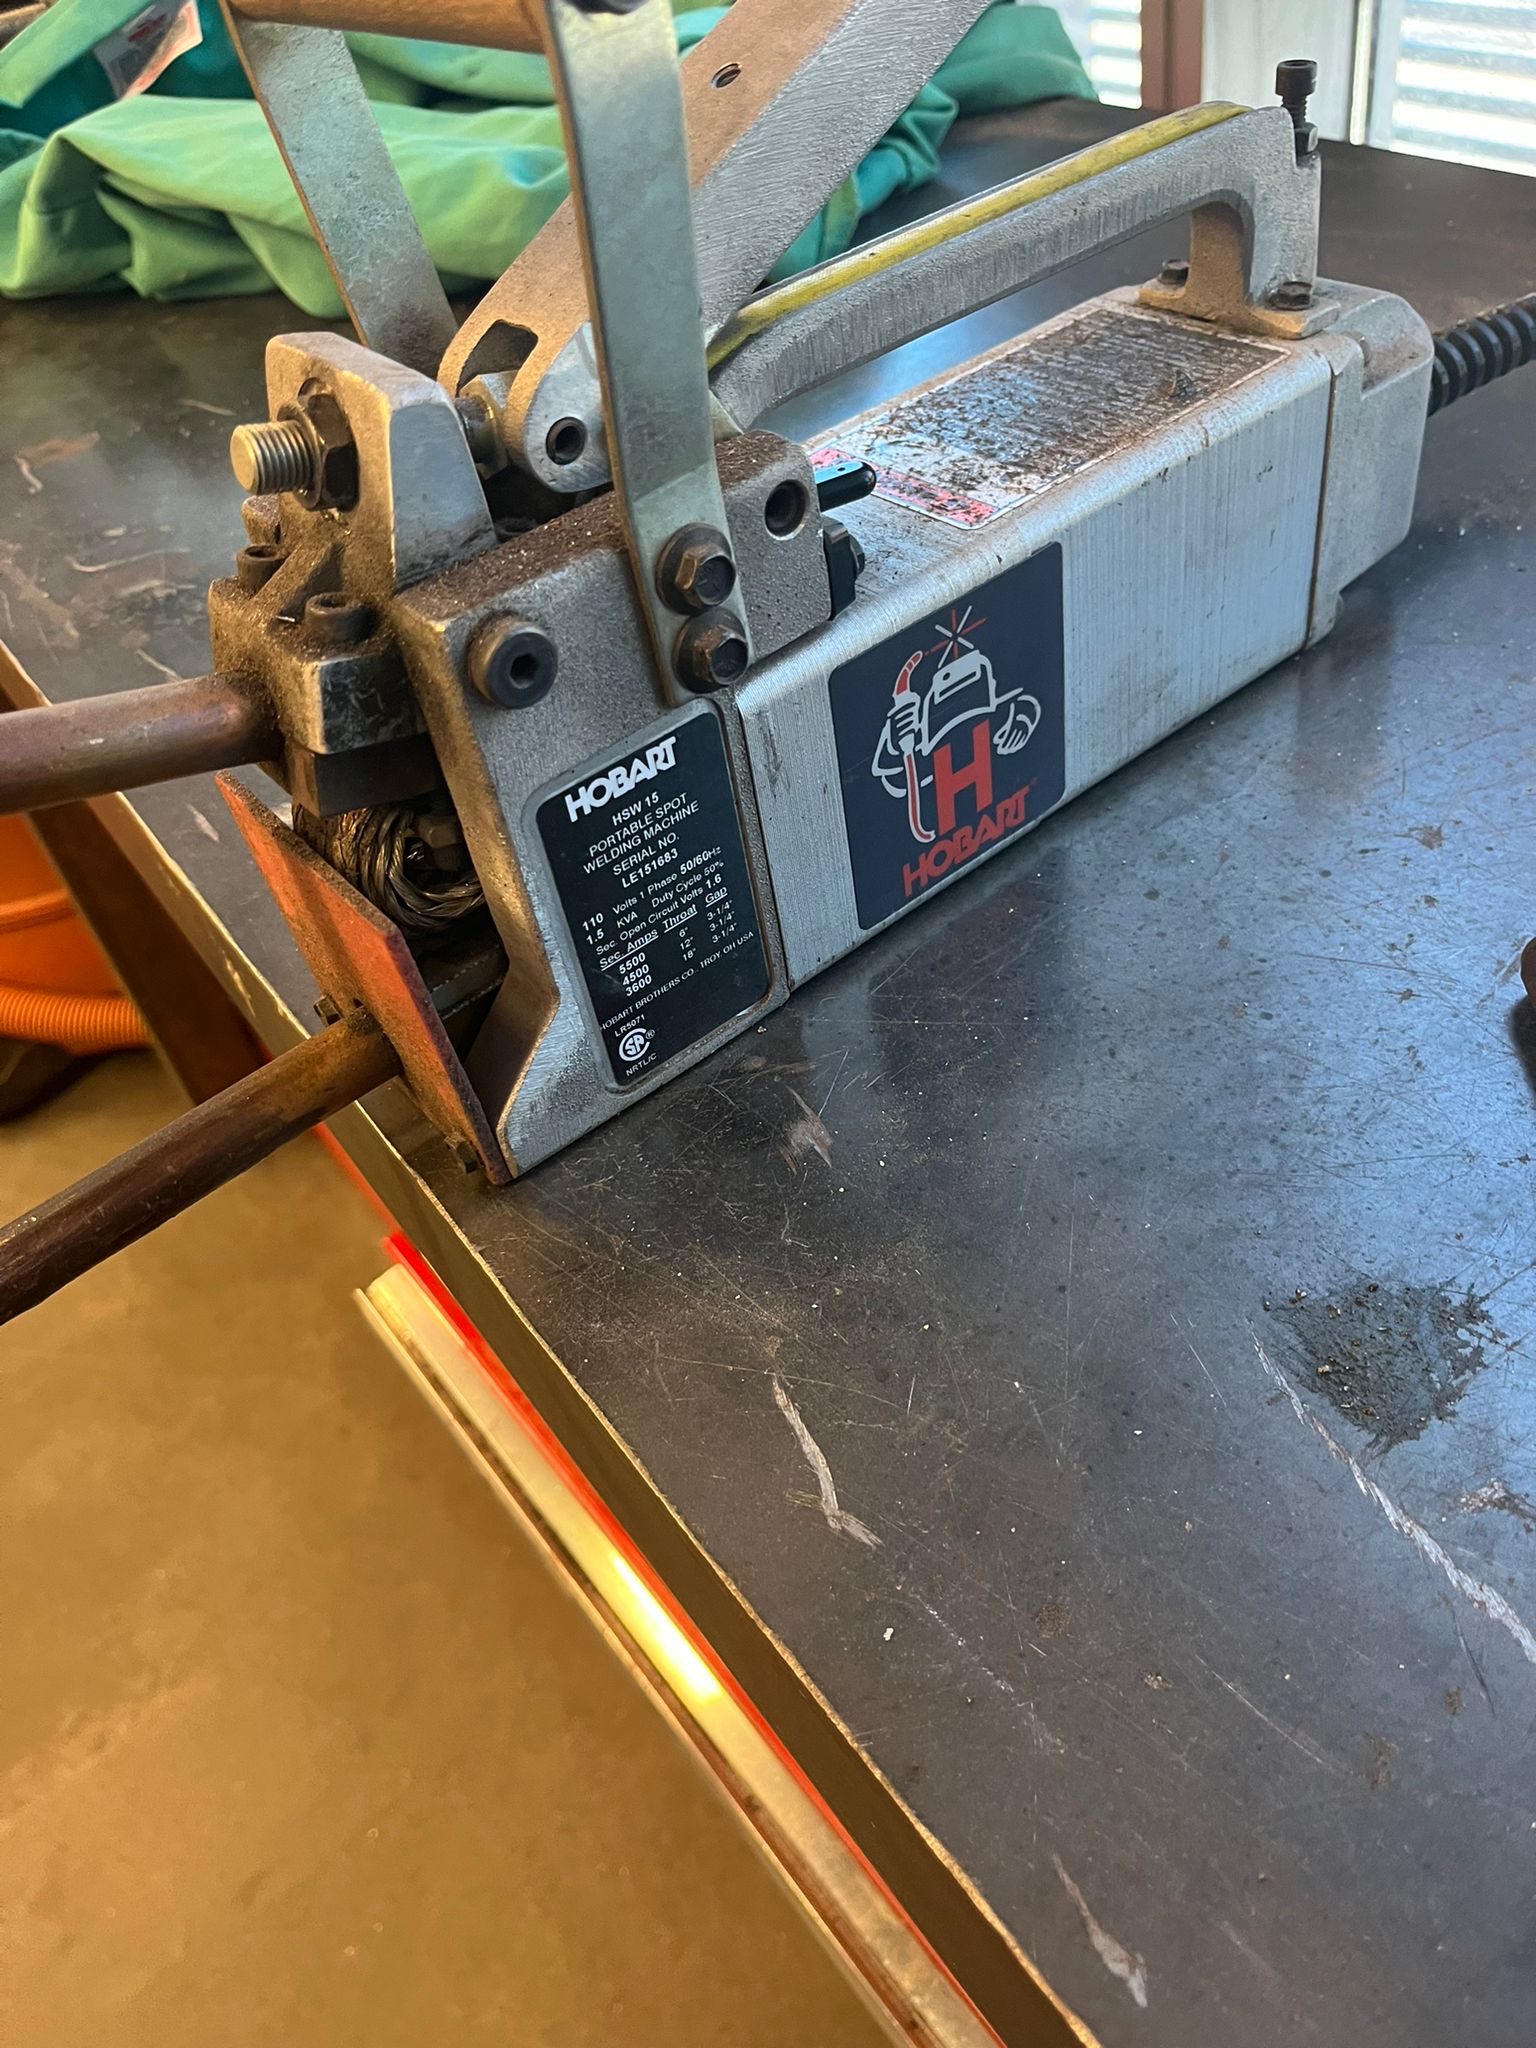
Spot welding
This part was exciting. After I had gotten each piece ready for assembly it was time to weld them together. To spot weld we were using
Hobart spot welder
When I was getting trained on the device, the process was to put the two pieces I want welded in between the arms of the welder, press them down,
then flip the switch to weld.
This is a simple tool. But when I came back to make my project, the welder was broken, such that any time you pressed the arms down it would weld.
It was extremely dangerous. With the help of John, we were able to hold it into place so that I would be able to weld the tool box together.
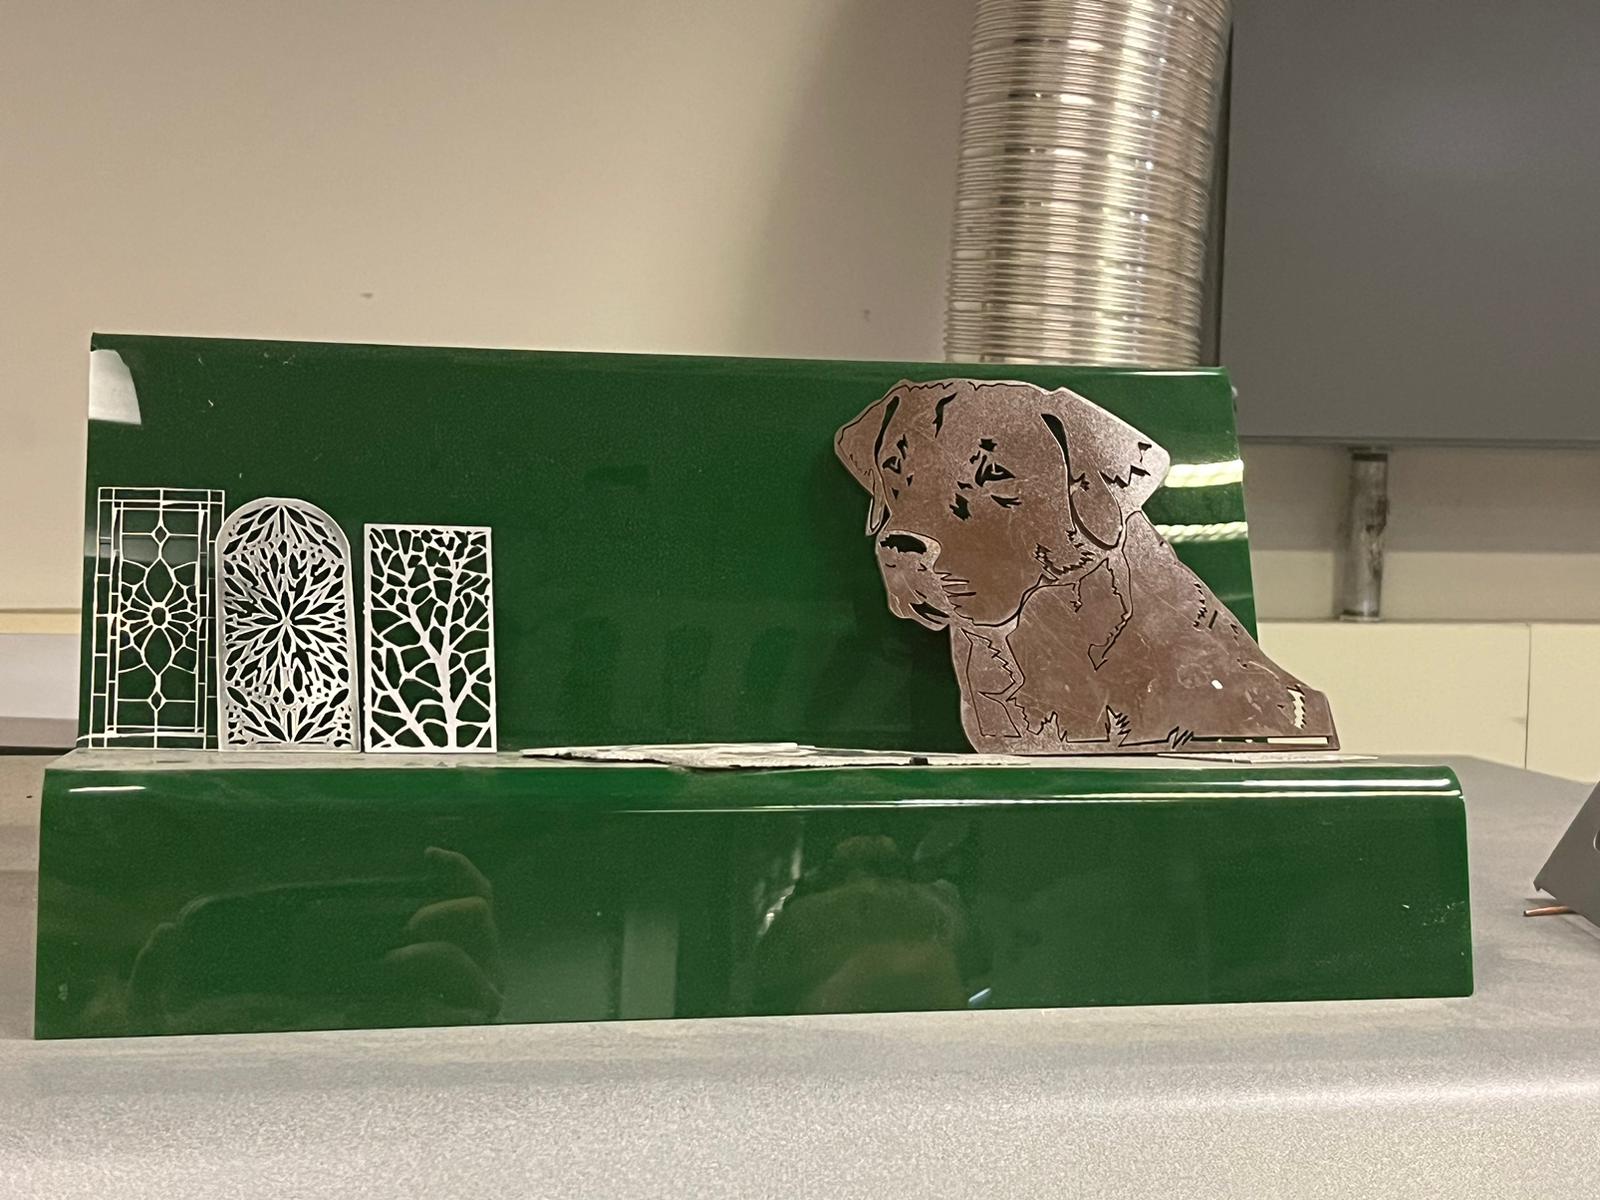
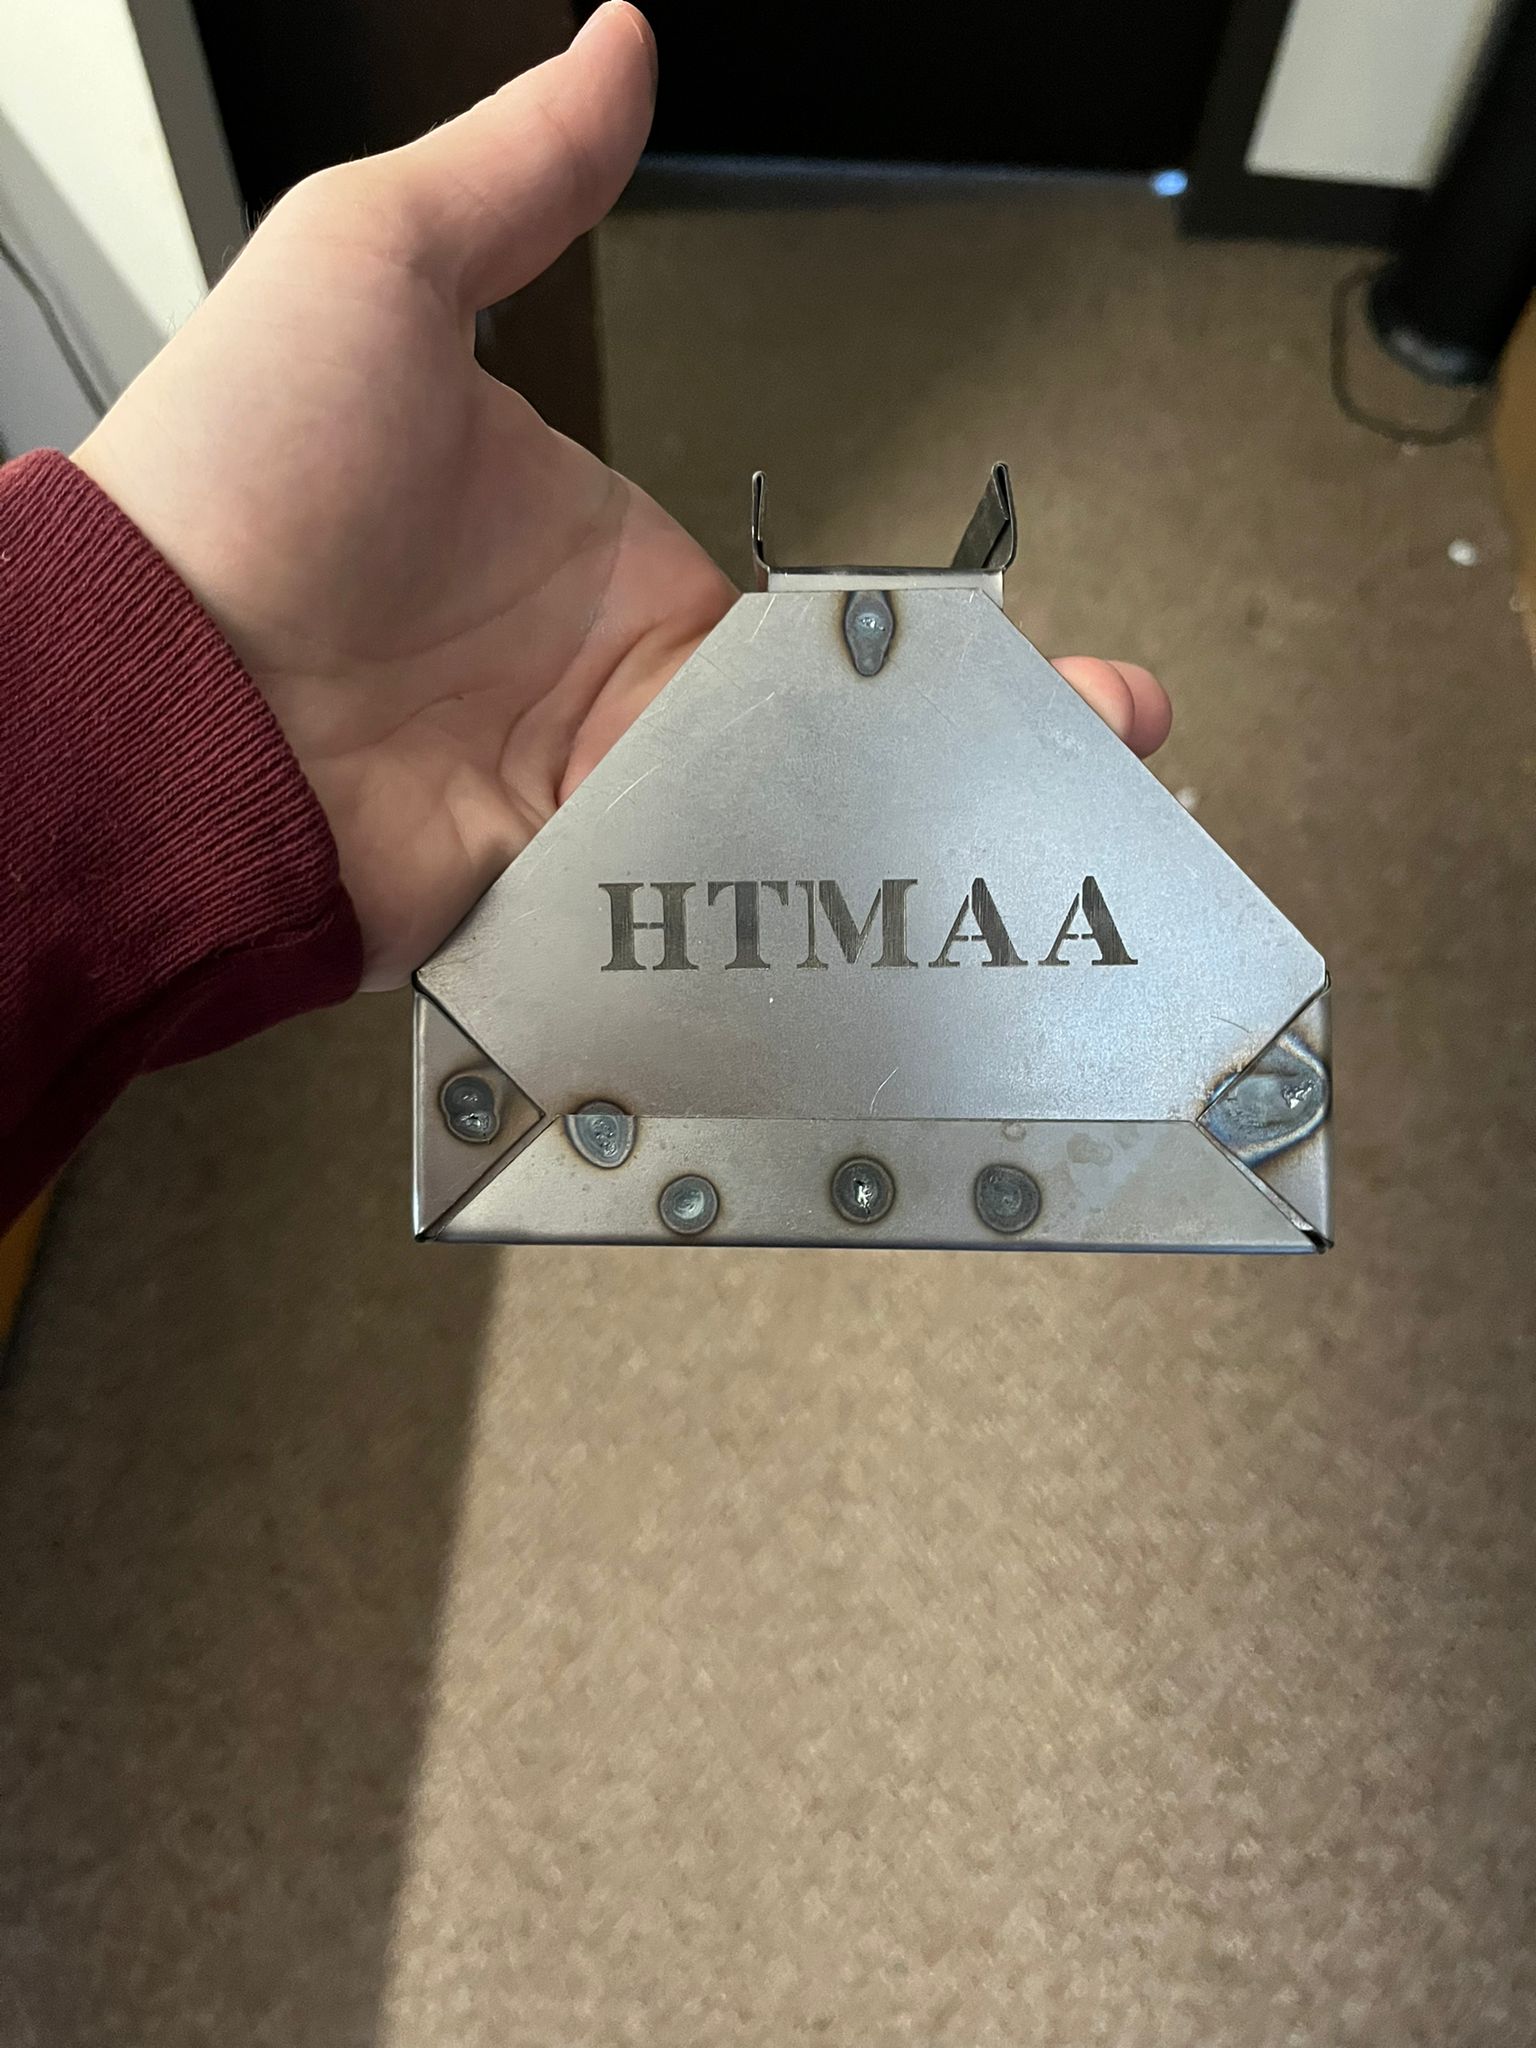
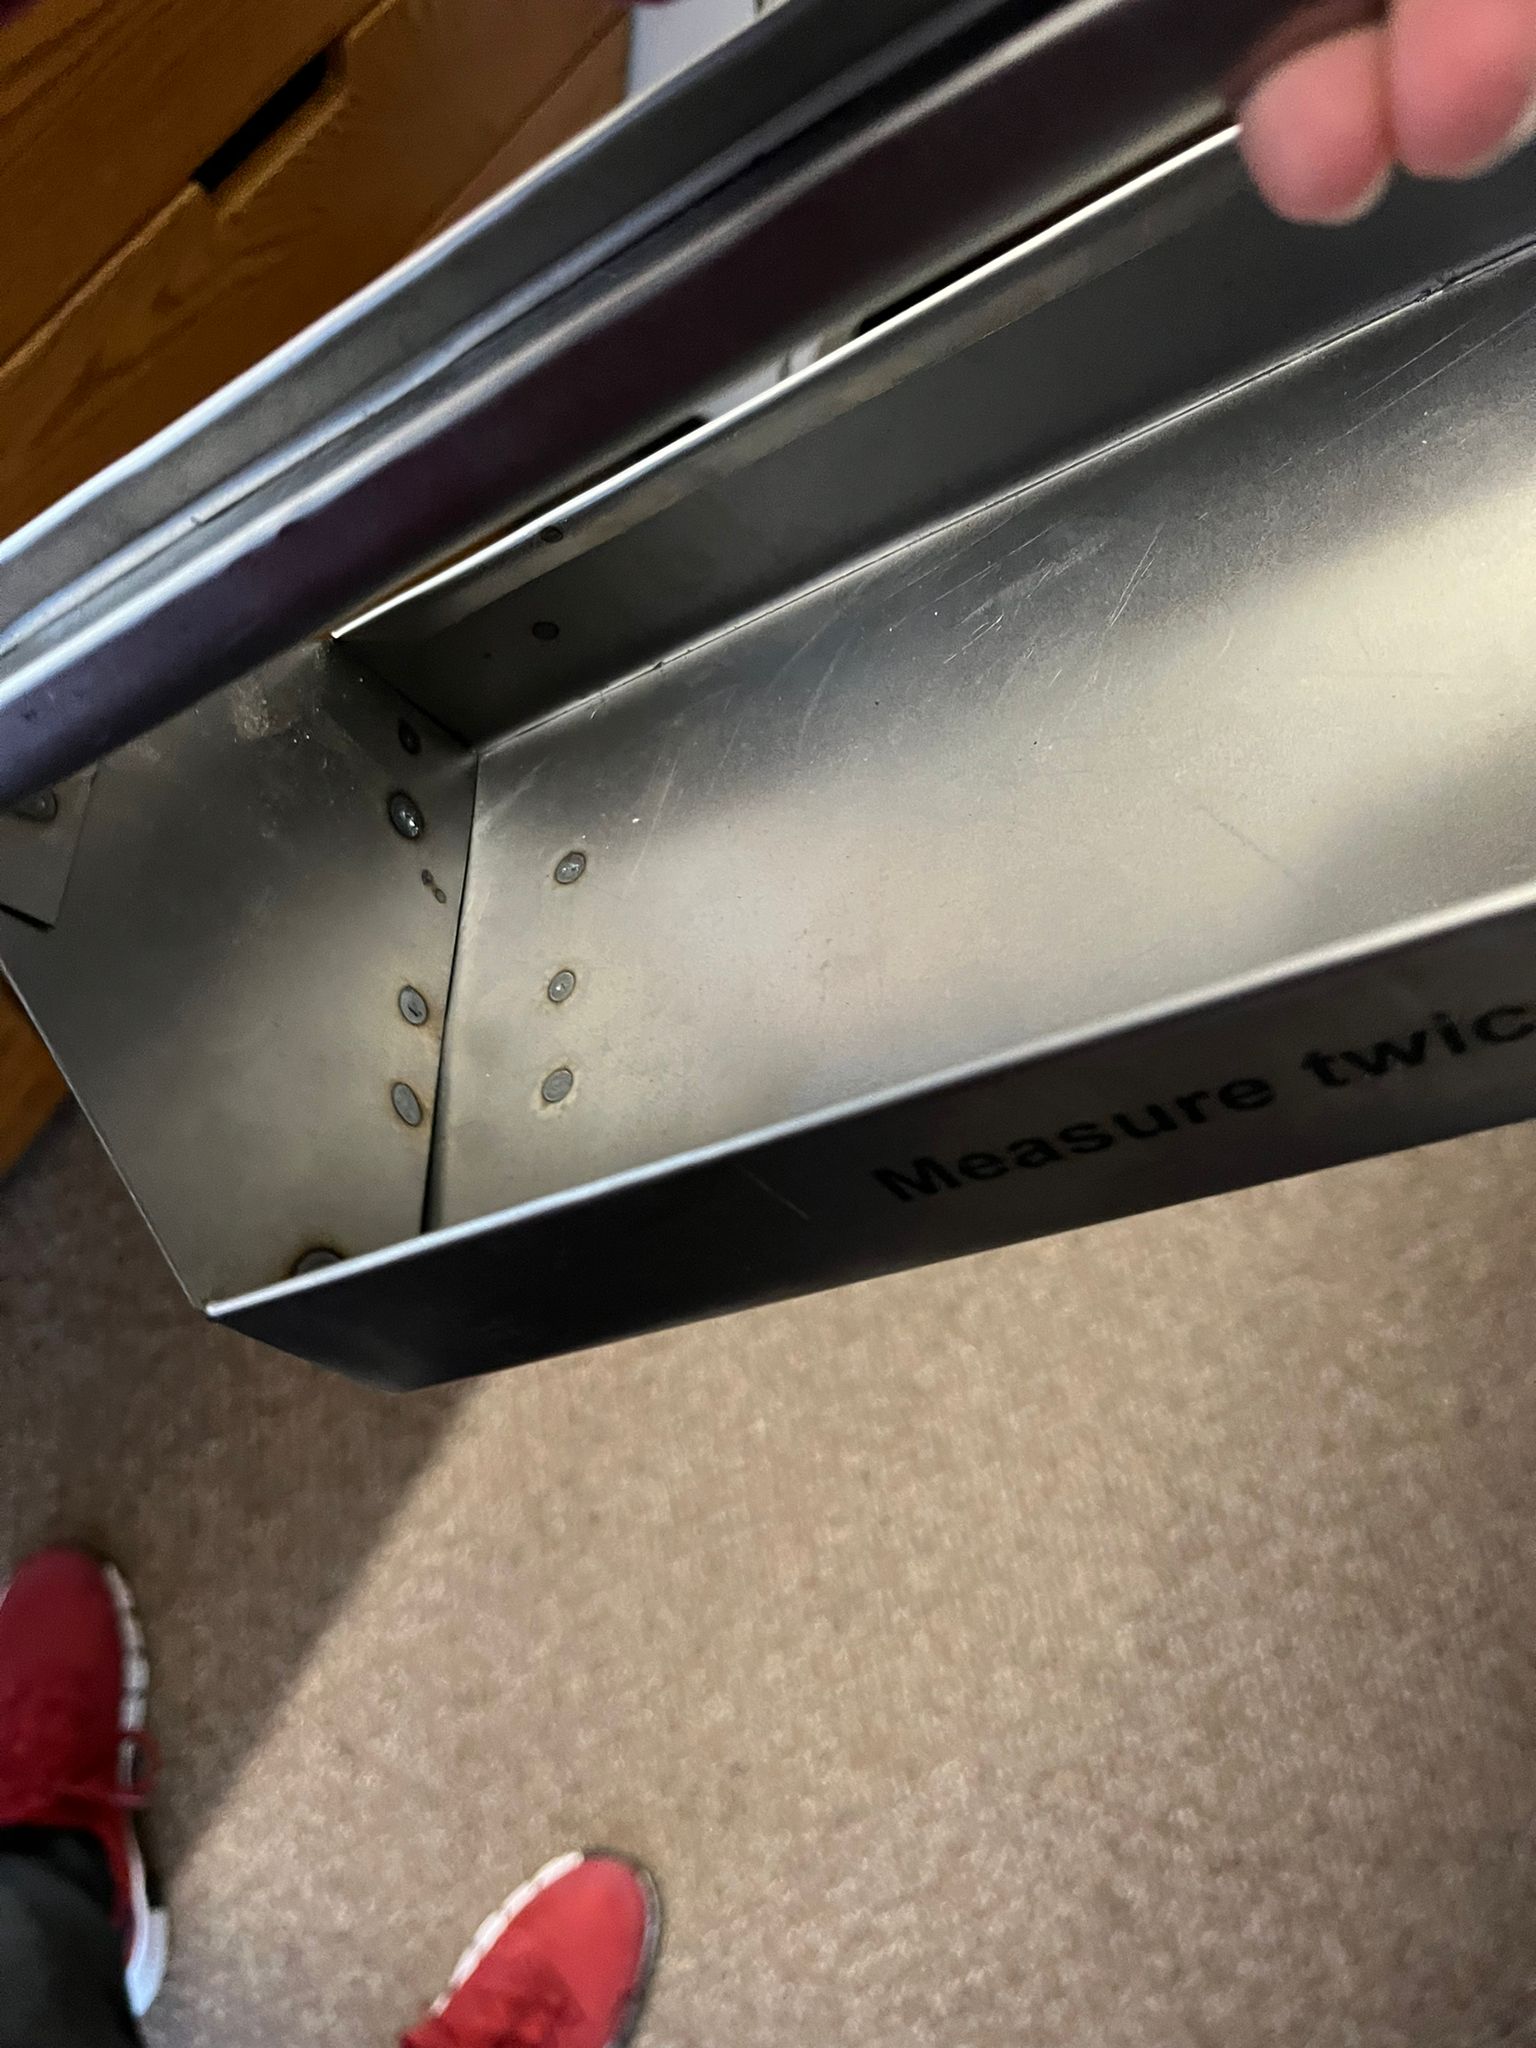
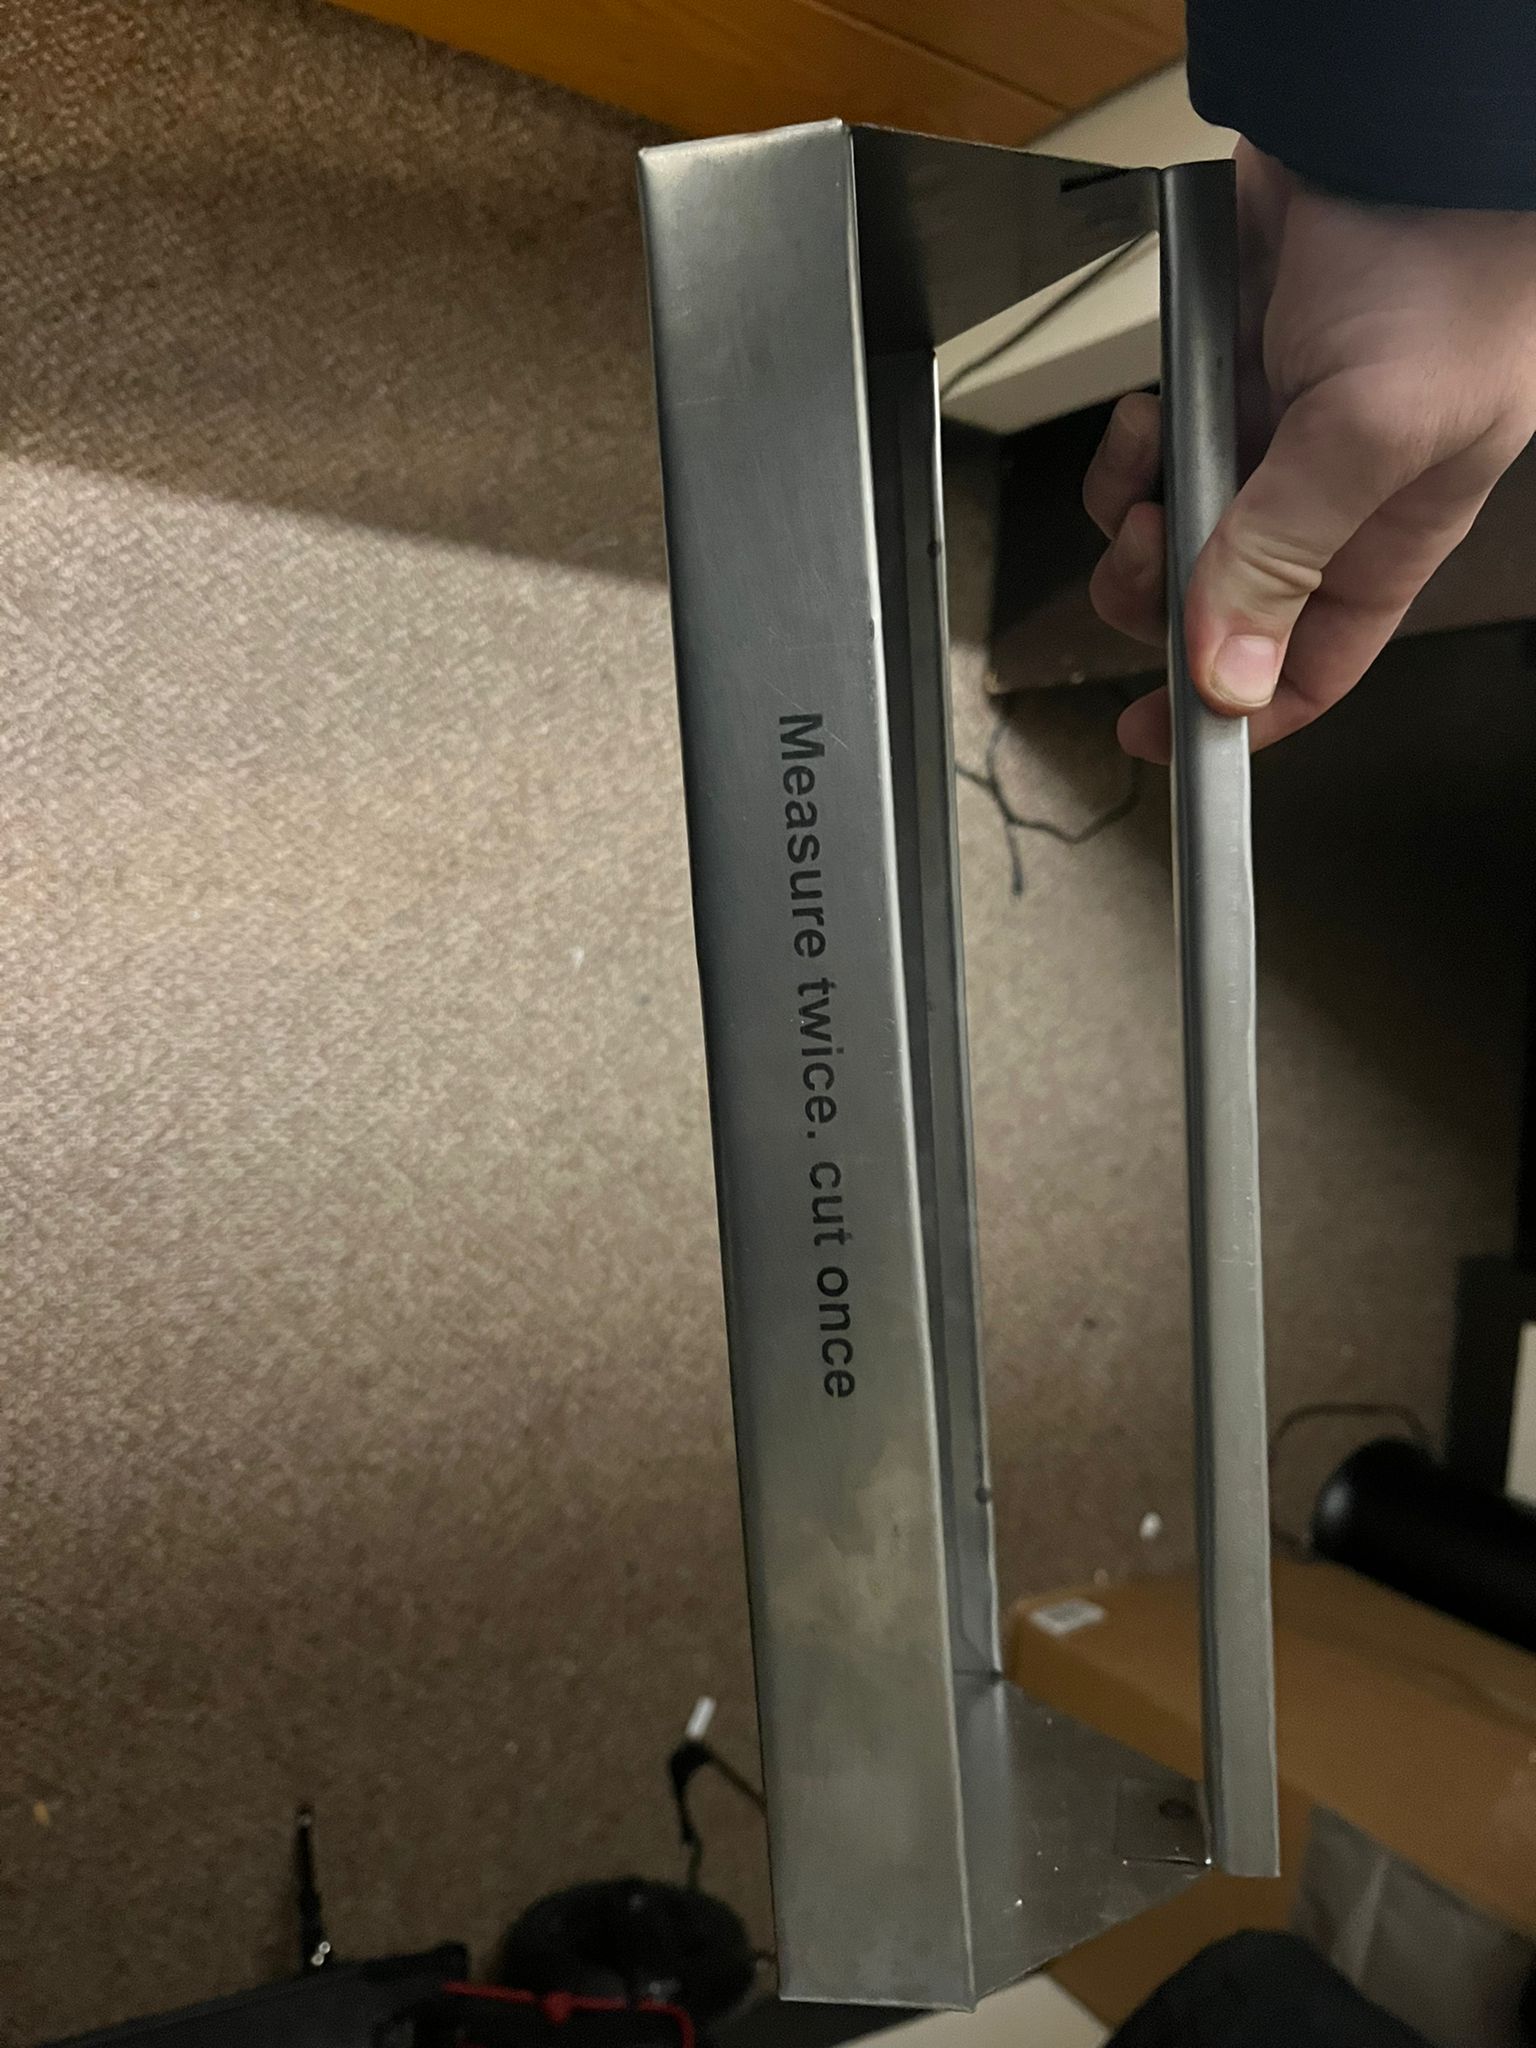
Finished Product
I was pretty happy about how the tool box turned out. Although, when I had come in to print out my own design, adding some words to the sides, the fablight machine was
broken. I felt pretty comfortable throughout the entire process except for the spot welder. John was super helpful in the process and was extrememly approachable.
Design Frustrations
For modeling what I wanted to make I needed to use the sheet metal section of fusion. And even after watching a few tutorials I waas a little confused
this how to model hems and the combination of two parts. Because of this I took the tool box design and tried to add my flare to it. I tried adding my own
words to the sides. In order to do that I downloaded a stencil font, which would allow for the letters to be cut out in the best way. Then I tried adding text,
extruding then projecting to get a clean DXF file. I was frustrated for some time because Fusion would not let me extrude the text. After doing some
Google searches I found that this was just some but and that by using a different font it would work, and it was correct. I changed fonts and was able to get
the DXF I wanted.
Do hem first, then middle portion first
Finger break
Line up hem with inside line. Lock in place then bring bottom up then press down on fingers again ti make hem
Go to welding shop
Anvil, flatten out hem
Got back to finger breaker, can roam off fingers to fit the thing
Spot weld
Pair of pliers with a switch